How to Brew With a Cloth Coffee Filter
Share
Brewing with a cloth coffee filter and a traditional Costa Rican coffee maker, is a delightful process that combines simplicity and tradition to produce a uniquely flavorful cup of coffee.
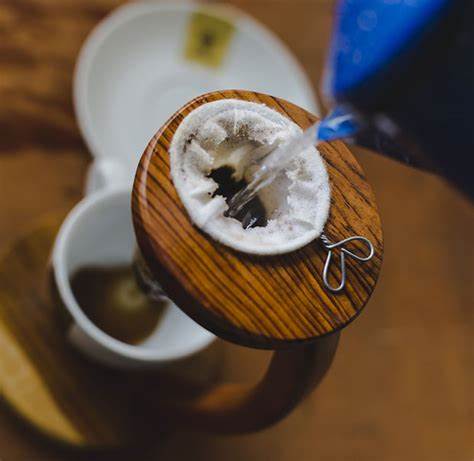
As you probably know by now if you have one in front of you while reading this, the Chorreador is a simple, yet elegant device that has used for brewing coffee in Costa Rica (and other countries) for generations. It consists of a wooden stand holding a cloth filter (known as the "bolsita") above a coffee cup or carafe.
The design and the use of a cloth filter contribute to a distinctive brew, highlighting the coffee's natural flavors and oils often trapped by paper filters.
This step-by-step cloth filter brew guide will help you master this unique brewing technique and can elevate your Chorreador coffee experience.
What You’ll Ideally Need
- Fresh Roasted Coffee: 15 grams
- Chorreador
- Timer
- Cloth filter
- Kettle
- 250 grams of Filtered Water
- Coffee Scale
- A coffee cup
- Stirrer (optional)
- Grinder: Grind Size: Medium Fine
Step-by-Step Brewing Process
1. Soak Your Filter
Before you use the fabric filter, rinse it thoroughly with clean water (no soap please) and drain it. This step is crucial for removing any natural fabric taste. Place it in a dry, clean towel to remove excess moisture. Then place it in the top of the Chorreador.
2. Preheat Your Coffee Cup
Preheat your coffee cup along with the Chorreador filter for one minute. Then, empty the water and place it under the filter. Preheating ensures that your coffee remains at a consistent temperature during brewing.
3. Grind Your Coffee
You’ll need a medium fine grind, similar to what you would use for a V60. Use 15g of coffee.
4. Add Coffee
Pour your ground coffee into the cloth filter. Avoid compressing the coffee, as it can affect the flow and extraction during brewing.
5. First Pour
Once your kettle reaches between 195 - 205 degrees Fahrenheit, pour in 50g of water to allow the coffee to bloom and then carefully lift up the sock just a little and give it a gentle swirl (or use a stirrer) just to mix everything together and so you don't have any pockets of dry coffee.
6. Second Pour
Increase your pouring speed slightly and in a circular motion add water up to 100 grams and then pause for 10 seconds.
7. Third Pour
Continue pouring in a circular motion and add water up to 150g and as before wait 10 seconds.
8. Fourth Pour
As in the previous 2 steps Continue pouring in a circular motion and add water up to 200g and again wait 10 seconds
9. Final Pour
Pour the remaining 50 grams of water over 10 seconds. In total, you should have used 250 grams of water in about 2 minutes (give or take a few seconds)
10. Allow Coffee to Drip
Let the coffee finish dripping which should finish at around 3:00 but expect some variance here. Taste is the most important thing!
Here is a Summary of the Process:
- For the first 10 to 15 Seconds pour 50g of water - Gently Swirl
- Let the coffee bloom up to 45 seconds to 1 minute
- Pour up to 100g total between 1 minute to 1:10 wait 10 seconds
- Pour up to 150g total between 1:20 to 1:30 wait 10 seconds
- Pour up to 200g total between 1:40 to 1:50: wait 10 seconds
- Pour the remaining water up 250g total, should end at about 2:00 to 2:05
I know this may seem complicated at first, but believe me, it will become very simple to you after doing it just a couple of times!
Final Takeaway
What sets the Chorreador apart is its emphasis on simplicity and tradition. It's a method that requires minimal equipment and technical skill, yet it can produce a cup of coffee that rivals those made with more complex machines.
The brewing method encourages a more mindful and appreciative approach to coffee preparation and consumption.
Brewing coffee with a Costa Rican Chorreador is not just about making a cup of coffee; it’s about embracing a piece of Costa Rican culture and tradition.
So, take your time, enjoy the process, and savor the unique taste of coffee brewed the Costa Rican way.
